Translate

Showing posts with label On The Workbench. Show all posts

Thursday, January 2, 2020

On the Workbench: Celestial Lions, Part I

My first project for 2020 is working on the Celestial Lions from Warhammer 40k! I stumbled across them in an index of Space Marines and was struck with their color scheme. Being that I'm sick to death of seeing Ultramarines everywhere, I decided that I wanted to do something decidedly different. It turns out they've been featured in a few of the 40k books lately which has really fleshed out their story.


Without giving too much away, they were targeted by their side's own Inquisition and nearly obliterated for a crime they didn't commit. Their chapter barely survived and has been struggling to rebuild for some time.


I'd painted up a test figure a few months ago and was really pleased (for the most part) with how he turned out. As a result, I've spent the last week or so working on the Celestial Lions using figures I'd already acquired.


After priming in black, the figures were given a coat of Retributor Armour spray. They were then given a wash of Games Workshop Agrax Earthshade Gloss in order to maintain that brilliant shine. I then applied a drybrush of Vallejo Gold followed by one of Vallejo Silver. I think it really makes the armor pop.  


The helmets and shoulder pads were then given a coat of Vallejo Prussian Blue, followed by a wash of Games Workshop Drakenhof Nightshade. They will eventually be given a lighter coat of blue; I think I used Vallejo Deep Sky Blue on my test figure. 


While those were drying, I went to work assembling a few more Space Marine Hero and Primaris figures that I had laying about. The book Spear of the Emperor by Aaron Dembski-Bowden confirmed that the Celestial Lions have Primaris Space Marines (second generation superhuman warriors who are even stronger than the regular Space Marine).


I'm going to paint up a very small number of regular Space Marines for my Celestial Lions to represent just how decimated the chapter was after the massacre. The bulk of the force will be the afore mentioned Primaris Marines with some Space Marine Scouts thrown in there as well. My goal is to finish up the Tactical Squad by the end of January.

Friday, December 20, 2019

On the Workbench: Baa Baa Black Sheep

Work progresses on my other projects, but as is pretty typical I get new ideas in the middle of working on them. In this case, I was inspired while working on the Green Angels to start on Black Sheep Squadron!


This time, however, instead of going with a historically accurate paint job I opted to paint the X-Wings up as the "meat heads" from the 1970s TV show Baa Baa Black Sheep (also known as Black Sheep SquadronI after syndication). I spent many, many hours watching this show on the History Channel while I was growing up; it's also perhaps unsurprising that Grandpa was a fan of the show as well. 


The show presents a very fictionalized version of VMF-214. The real squadron was formed in late 1943 by USMC Major Gregory "Pappy" Boyington with aviators who were unattached to any other squadrons in the South Pacific. They flew the iconic F4U Corsair and did quite well for themselves: in 84 days the Black Sheep destroyed or damaged 203 Japanese aircraft and became the stuff of legend. Major Boyington himself would end the war with 28 kills (but not before he was shot down and captured). "Pappy" was awarded the Medal of Honor and eventually released at war's end. 


The ships are pretty much done barring a few more details. "Pappy" is represented with an arrow on his starboard wing, which was appropriated from a 40k Space Marine decal sheet. The rest of the squadron only bear the US insignia. To differentiate the Black Sheep from the Green Angels, I placed the hull insignia back a little bit more. The nose cap was also painted with Vallejo Dark Prussian Blue and given a dark grey wash. I feel it breaks up the paint job a bit and can also be seen on some of the aircraft used in the show. 


Another really awesome aspect of Baa Baa Black Sheep was the fact that they used actual Corsairs in the show! Nowadays it would probably all be CGI, wouldn't it?


The rest of the painting pretty much follows what I did for the Green Angels: gloss black primer, coat of Tamiya Navy Blue spray paint, gloss coat, dark grey wash, then decal application. Then that's followed with another gloss coat, weathering, then a matte varnish.


I again used Mark I 1/144 scale decals for the insignia. This time, however, it was the version used by US aircraft between 1943-1947. They again went on extremely well (for the most part).


As what of the good old Green Angels? They're 98% done! They would've been done a few nights ago, however, until I realized that the disc magnets I got for the bases don't fit. I'll put up a post once they're completely finished though. Shouldn't be much longer now!

Tuesday, December 10, 2019

On the Workbench: The Green Angels, Part III

Just a quick update on the Green Angels for you all!


I started applying decals today, which is something I've been dreading. Today I confirmed something that I've long suspected: I really don't like applying decals. Yes they make the model pop, but I've found that my patience really wasn't up to it today. But I chugged along anyway as best I could.


I didn't help that I was having issues with some of the decals. I think my Navy decals are too old or something, because they kept splitting in two. After three tries I decided to go on without them. Unless I can find replacements (it took me forever to find the sheet that I ended up getting) I think they might go without. But I think it might be okay.


I do have to say that the decals look really nice! I picked up a few sets of 1/144 scale MARK 1 brand USAAF insignia and number decals for this project. So far I just have these two X-Wings done and I'll get to the other two later this evening.   

Tuesday, December 3, 2019

On the Workbench: The Green Angels, Part II


 Made some progress on the Green Angels today! As I’ve said in previous posts, they’re based off of  a photo of an F4U Corsair from NAS Los Alamitos in Southern California. 


I opted to paint the engine intakes orange because I thought it’d look a tad cleaner. They were then given an orange wash, while the rest of the ship was given a light grey wash. I’d intended to panel line the model but realized that it might be a bit much at that scale.


Then I realized that I hadn’t applied the decals. I’d been intending to apply them before washing or weathering the ship, but I think I can still make it work. I’m going to apply some gloss varnish before applying them and call it good.

The decals themselves are a mixture of 1/144 and 1/350 scale sets. They’re going to be the next step of this project.


Monday, November 18, 2019

On the Workbench: The Green Angels, Part I

Just just a quick update from the workbench! 


The new Green Angels squadron is progressing nicely. Just sprayed them with a gloss varnish and I think they look even better than before. Once everything’s dry it’ll be time to move on to decals and weathering. Because of my busy schedule it’s taking me a lot longer to finish these than I’d like, but I feel like I’m making steady progress overall.

Thursday, November 14, 2019

On the Workbench: Putrid Choir of the Death Guard

Taking a bit of a break from X-Wing to post some progress photos of my Putrid Choir test figures. These guys have been sitting on the workbench for a while: I first picked them up when Dark Imperium was released in 2017. They promptly sat in the box until earlier this year when I decided to take a crack at the Death Guard. There they sat again until I decided to make a post in the hopes that I'll be inspired enough to finish them (and their pestilence-ridden brethren) in the very near future.


For those unfamiliar, the Death Guard are from Warhammer 40k and are a chapter of Chaos Space Marines dedicated to Nurgle, the surprisingly jovial Lord of Decay. These fellows accepted Nurgle's "gifts" and despite their grotesque appearance, are immune to disease and pestilence. Not to mention that they're deadly proficient warriors. 

Yup, he sure seems like a nice and happy fellow!

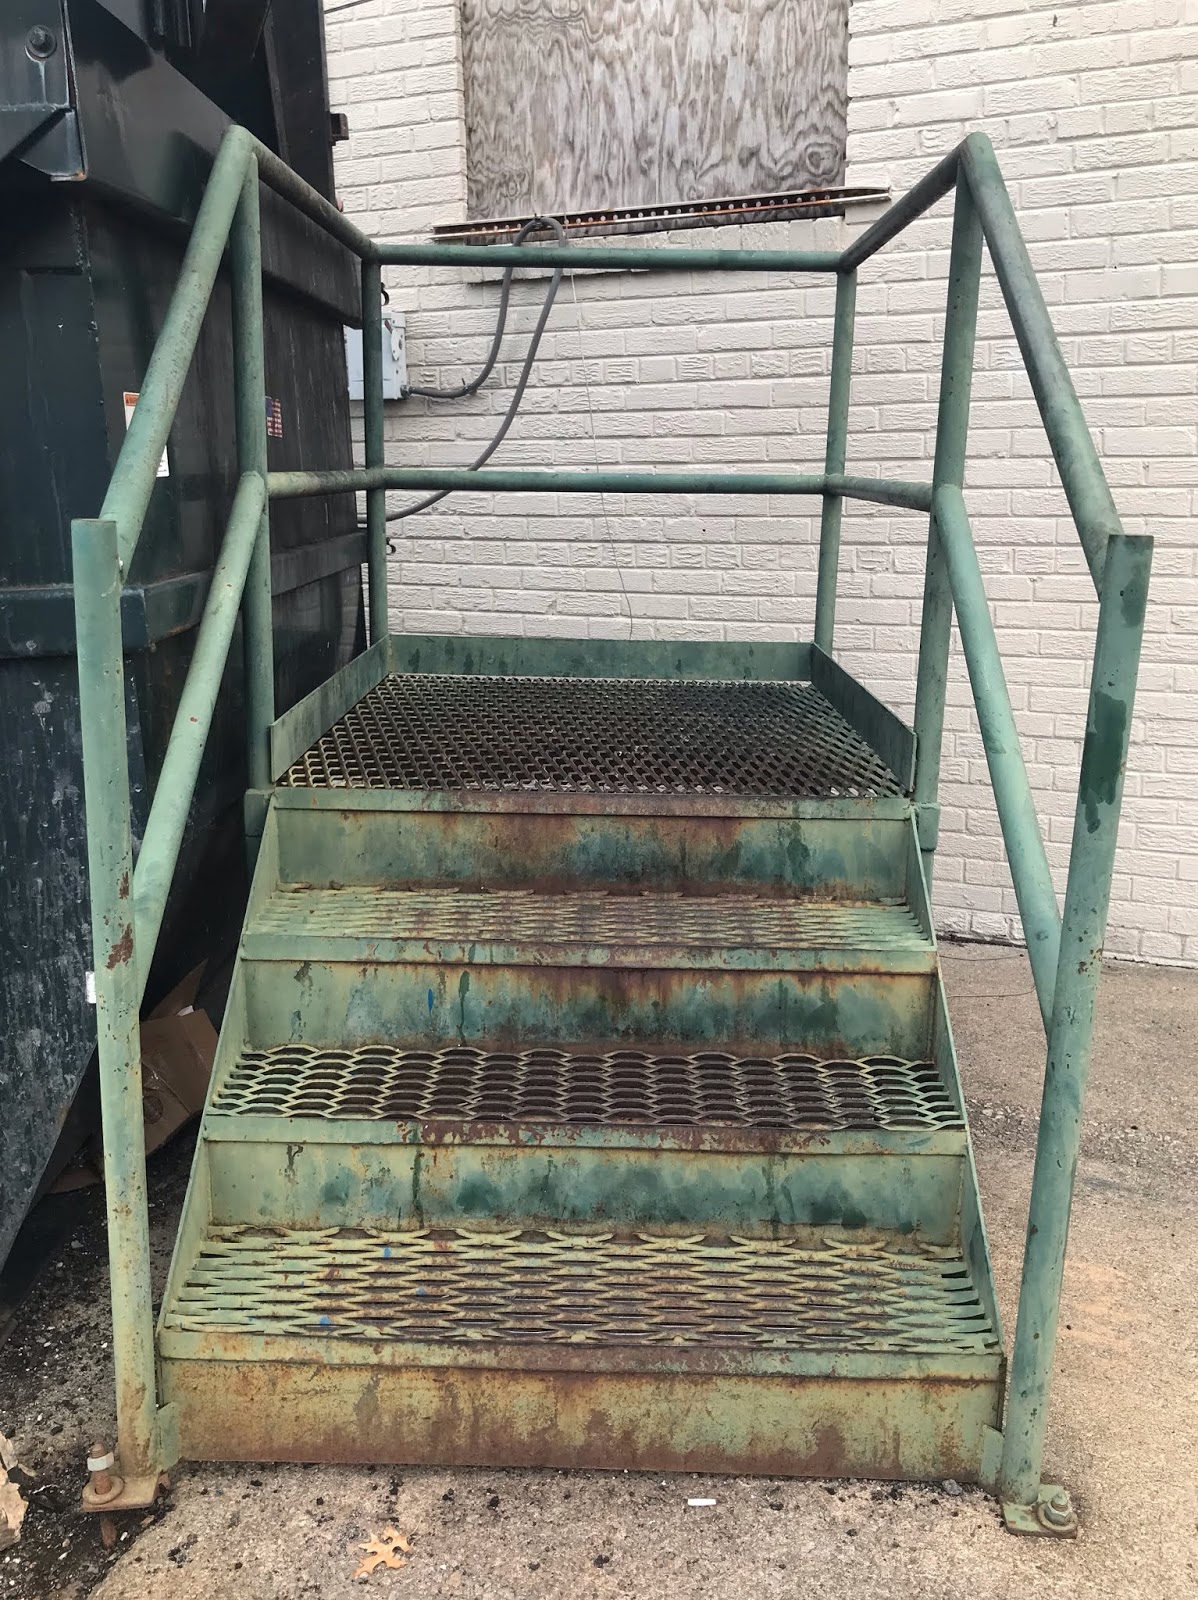
When the set first came out, it seemed that everyone was painting these guys up in standard Death Guard green. This is fine but I wanted to do something different. Inspired by a faded set of green dumpster steps I pass on my way to work, I decided to paint them up as the Putrid Choir warband. These gents announce their presence with Undertaker-sounding bells in a maddening cacophony that will test the sanity of nearly every opponent. I may or may not also be working on a soundtrack to go along with playing. 

The "Death Guard dumpster" steps.

Anyway, here are some more detailed shots!


These guys were basecoated with two thin coats of GW Sybarite Green over a white primer. This was my first time trying either and what a difference it made! They were then given a bath of GW Agrax Earthshade and given two drybrush coats of the original color to bring it back up. The result is pretty grimy and dirty power armor that, well, looks like a dumpster. I'm pretty pleased with it! 

I've got plenty more of these guys basecoated and ready for finishing. Like many other hobbyists, however, I tend to get distracted by other projects and have a really hard time finishing projects that I start. I think my New Years Resolution for 2020 will be finish many of the figures I've started but have sort of abandoned over the last few years. 

I'm still not sure how to do the bases, though. If anyone has any ideas please let me know in the comments below!

Monday, June 24, 2019

On the Workbench: The Army of the Dead

One of my favorite scenes from the Lord of the Rings trilogy involves the Army of the Dead, where they turn the tide of battle in Gondor’s favor at the behest of Aragorn. Games Workshop has had these mdoelsnfor a few years now, and I’d decided that I needed to do another army. It also helped that these guys are quick and easy to paint: primed white, basecoat white, two coats of the new Hexwraith Flame Technical paint for that ghostly glow, and then drybushes with Ulthuan Grey. Base, and then done. 

I also decided to make the Stone of Erech as an objective marker. It was cobbled together from a ping pong ball, superglue, and green stuff. I tried to give it some marble veining, but mostly ended up stippling it with various shades of grey and white. It's a little smaller than I envision the stone to be, but I think it'll do for now.


Here are my completed figures so far! I have about 20 more sitting on my workbench that are primed and ready to paint. There are maybe 20-25 more that need to be assembled. I’ll be sure to get a finished shot of everyone together when the time comes.