Translate

Showing posts with label Flames of War. Show all posts

Monday, November 3, 2014

Flames of War: Romanian TACAM T-60 Tank Destroyers

After being recently sucked back into Flames of War, I became incredibly interested in the Romanians. It started when I picked up a copy of Red Bear with the intent of building a Soviet armored force. That's still happening...but I noticed something interested with the Romanians. Not only can you take them as Axis, but since the country switched sides in late 1944 you can also play them as Allied forces. I was drawn to the versatility of this idea...and I was hooked.

As such, I've just finished my first Romanian platoon. It consists of three TACAM T-60 tank destroyers. Romania lacked a solid industrial base and had to be creative when it came to armor. This particular vehicle utilized captured Soviet equipment: T-60 light tanks and dismounted M-1936 F-22 field guns. Records show that 34 of these were completed between 1943 and 1944, seeing service until the Soviet Union repossessed them after Romania defected to the Allies.   


Battlefront, the company that produces Flames of War, made these wonderfully detailed models. My local game shop had a discount bin of older products and so I was able to pick these up for $7.50 per vehicle. Score!!


Here's a view of some of the crew before I glued them into place. It's been a long time since I've done an entire 15mm figure and I was worried that I'd gotten really rusty. Thankfully this was not the case. These Romanians were a breeze to paint up!


A view of the tank hunter platoon from the front. Note the different positions of the crew inside each vehicle. 


The platoon from the rear. Although Battlefront makes some spiffy Romanian decals, I opted to not to put them on the vehicles. Of all the period TACAM T-60 photographs I examined, only one vehicle had any sort of national markings. This leads me to believe that the practice was quite uncommon (but I will be including them on an objective marker I'm working on...but more on that later).  

So that's my first Romanian platoon! After the Soviets repossessed the TACAM T-60s in October 1944, the country once again needed to find an adequate tank destroyed. The solution? Take an old R-2 tank - better known to the world as the Panzer 35(t) - and replace its turret with a Soviet supplied ZiS-3 field gun. The result was the TACAM R-2. This will be covered in a later update.


Friday, January 10, 2014

Messerchmitt Me 262 Schwalbe

I present to you my newest Flames of War model, the Messerschmitt Me 262 Schwalbe. Developed by the Nazis, it was the world's first operational jet aircraft. Although it saw limited service in the waning days of World War II, the Schwalbe changed the face of aviation forever.

Since the Me 262 is the only German aircraft option in Devil's Charge, I decided to take it. Even unreliable air cover, I've found while playing, is better than no air cover at all.


This was my first attempt at two things: painting an aircraft and using decals. I think the model came out decent at best. I had the most issues with keeping the decals from bunching up once they were applied to the model. To hide these screw ups I applied battle damage in the form of black paint; smoke or oil perhaps?

But I am happy with how the canopy turned out. If you look, you can make out the reflection of clouds and the sky in the "glass."

If nothing else, this model was a learning experience. I'm moderately happy with it but realize I can do better. Practice makes perfect!

Thursday, December 27, 2012

Captured Sherman Tank

I acquired a new Battlefront plastic Sherman kit a few months ago and have been wondering what I should do with it (as the other Shermans I have are slightly smaller and out of scale) for some time. I'm not sure how it happened, but it finally dawned on me one night. I wanted to see a Sherman in German service.

I assembled and primed the model before painting it US Army olive drab. I then applied uneven coats of German Dunkelgelb, as I wanted parts of the original paint to be showing through. The idea was that this tank was recently captured and thrown into Axis service ASAP. 


I'll be honest: the German crosses really bug me. But that was the look I was trying to go for. The following photos show hastily painted, sloppy Balkenkreuzen. It's obvious the new German owners didn't spend a lot of time on it, nor did I.


My next step was to apply winter camouflage to the model. This was accomplished using my traditional method of toothpaste and spray paint.


The tracks still need to be painted, but this model is essentially done (apart from the commander who will be coming later). Comments, as always, are appreciated.

And this, ladies and gentlemen, is going to be my final update for a while. As I mentioned in a previous post, I'm moving across the country for grad school in just a few days and don't know how soon I'll be able to work on anything. But it'll be soon enough!


Friday, December 21, 2012

Raus! Raus! Schnell!

My bailed out Panzer crew is finally done! This was my first attempt at really painting 15mm figures, and I certainly learned quite a few things along the way: like to wait until the end to paint the pea dot camouflage or to prime and paint the figures on a Popsicle stick first before gluing them to a base. And other things like that too. I can't wait to take all that I've learned on these guys and apply them to my next batch of figures (though that may be some time from now, as I'm getting ready to move across the country). 


As I mentioned previously, I wasn't happy with the modelling clay I initially used for the snow. After a bit of research I decided to use Golden Coarse Pumice Gel. What a Godsend! I applied it with no problem and it was dry after only a few hours. I then gave it a base coat of Screaming Skull and highlighted the whole thing (several times) with Skull White. Not too shabby in my opinion.

And I decided to add a little color to it all and make some of the crew pretty seriously wounded. It also may or may not have been an attempt to hide some mistakes during painting.....but I'll never tell for sure.

What do you think? Any feedback is welcomed!

Thursday, December 20, 2012

Marder II

After experimenting with painting camouflage a few months ago, I finally worked up the courage to try it on a vehicle. I picked up two Marder II's on eBay for a steal back in September, so I finally set to work.

Instead of using the standard late war red, green and dark yellow camouflage, I decided to mix it up and substitute the latter with classic Panzer grey (which was authorized, but seldom seen I understand). Sadly I failed to capture any photos of it before I winterized the model.


To winterize the Marder II, I dabbed toothpaste on the model and covered up certain areas (like the tracks and crew compartment) with masking tape before giving it a light spray of white paint. After the tape and toothpaste was removed, and the model allowed to dry, I lined the recesses with watered down grey paint.

The final result is a tank destroyer that's ready to see some service on the Eastern Front!

Car Trouble, Part IV

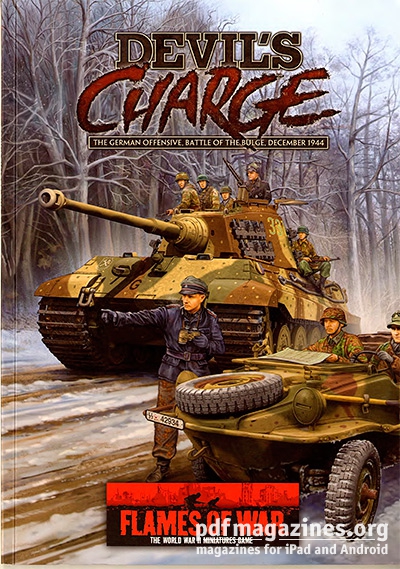
Finally painted the Schwimmwagen! After much debate, I settled on Ambush Camouflage (as seen on the cover of the Devil's Charge book). This was also to get some practice on it before painting up my King Tigers.


The project is coming along quite nicely. What I need to do next is paint up a driver (who will be in the water) and spectator (who will be laughing hysterically), and also add some realistic water to the base.


How do you think this is going? Any thoughts and comments are appreciated!

Tuesday, December 11, 2012

Car Trouble, Part II

Here's Part II of my latest project!

Once I got home I scrounged up the materials I would need for my crashed Schwimmwagen objective marker: base, model and blue foam. Not pictured is a ballpoint pen, metal file, glue and paint.


This was my first time using blue foam for modelling. What followed for the next few hours was a lot of cutting, gluing, painting and swearing. But ultimately this was the result:


The layout is a little different than what I had initially planned, but I like how it turned out. I may put trees along the banks of the river to give it more of an Ardennes feel, but I may not. With the Schwimmwagen added, it will look a little something like this.


The next step will be to cut the car in half in order to make it look like it's floating on its side. That will hopefully be done tonight. I'm contemplating adding bullet holes and other battle damage to the Schwimmwagen to make it look like it was run off the road during an Allied air raid. I suppose we'll see what happens as this progresses.

Monday, December 10, 2012

Car Trouble, Part I

The idea for a Flames of War objective struck my mind at work today, so I quickly grabbed a scratch sheet of paper. I got to thinking...what if some unlucky Schwimmwagen driver took a sharp turn too quickly and ended up in the drink? This is what I think it might look like.


I have a (non-FoW) 15mm Schwimmwagen that I need to use, and I think this just might be what I'm going to do. My friend Ben recently gave me some scraps of blue foam and so I think I can make the terrain rather easily.

Stay tuned for more updates!


Friday, December 7, 2012

Work in Progress: Bailed Panzer Crew

I've had these dismounted German tankers sitting on my desk since September, so I finally decided to start working on them last night. At 1 am. That's how I roll with these things it often seems.

I recently picked up a copy of Devil's Charge, the new Flames of War book that focuses on the German offensive in the Ardennes during December 1944. Since I'm putting together a list based on Kampfgruppe Peiper, I thought it appropriate to make these fellows Waffen-SS.

I used this tutorial from the Battlefront website for the pea dot camouflage uniforms. It really helped out and made the whole process quite simple.


I think the camo turned out pretty well, but I still have a lot of work to do on these guys. I'm still learning how to properly paint 15mm figures and I think these figures will be a good test of my skills. I don't think they're too bad for a first attempt, though.


One thing I'm not happy with, however, is my choice of basing material. I used some air drying modelling clay, but it's cracking and starting to come off the actual base. Someone online suggested using something called Golden Coarse Pumice Gel, so I think I'll give that a shot next time.

Friday, October 26, 2012

Experiments in Painting Camouflage, Part I

Painting camouflage is, quite honestly, one of the things that frighten me about doing WWII miniatures. Especially for German armor. So before I begin painting up any more Panzers, Panthers and Tigers (oh my!) I thought I'd conduct some experiments and get a bit of practice in.

Using the leftover side skirts from my first Panzer IV H, I set to work. The first was painted in that famous German tri-color camouflage pattern.


Using Dunkelgelb as the base color, I applied thin lines of red and green. As I progressed from left to right with the red, however, I found that drybrushing gave it the appropriate "feathered" look that the real tanks had. So I did this with the green too and was quite pleased with the results.


I then experimented with winterizing the camouflage. I applied masking tape over one side to keep it free from spray paint (I wanted to use the camo as a reference for the future, you see). On the uncovered side I dabbed on a little bit of toothpaste with a torn cosmetic sponge. After that was done, I gave it as light a spray of Testor's Flat White paint that I could. I ended up waiting less than 10 minutes for it to dry and took the skirt inside and gently began washing the toothpaste off. You can see the end result above, which I think was quite successful.

I repeated this whole process with the remaining side skirt. To keep it interesting  I used classic Dunkelgrau, or dark grey. I quite like how this turned out too. So much so that I think I'm going to go with this look for my Marder II's when they arrive.


This was an interesting experience overall, and I really like the way the side skirts came out. I've also read that applying salt instead of toothpaste works too, so I think I'm going to experiment with that method next time.

First Panzer IV Ausf. H

My friend Ben recently introduced me to a new game called Flames of War. It's a 15mm WWII game which, it turns out, is a lot of fun to play! After lending (and leasing) me his British tank force for our first few games, I decided that I needed to start building my own army to play against the Weasel.

I settled on an Ardennes-style German force. I've always loved the look of tanks in the winter, and so here it is - my first Panzer IV Ausf. H!


Underneath that white camouflage is German Dunkelgelb, or dark yellow. I realize that the foliage is a bit off for the Battle of the Bulge. Not only is the grass too long, but it's also too yellow (it was a much darker green when I applied it to the model, but I think the sealer is making it dry out faster). I'm in the process of replacing it; the Flames of War website offers a nice tutorial. So I figure I'll end up doing something very similar.


Here's a close-up of the tank commander. I'm really pleased with how he turned out! I'd never painted a 15mm figure before and think he came out pretty well. If you look closely you can see a red dot on his cockade - a detail that I'm particularly proud of.


I didn't attach the side skirts because, based on a lot of the photos I've looked at, the Germans tended to take them off in the winter months. You can also see where I tried to put snow and mud in the tracks. I think they still look a little too clean, so I'm going to go back and dirty them up a bit more using Games Workshop's new texture paints.

Overall, I think this tank turned out pretty well for a first time. The kit was easy to assemble and a joy to paint. I'll definitely be building a few more of these, so stay tuned for more German armor goodness!